Table of Contents
Introduction of How to See Light Levels in Minecraft
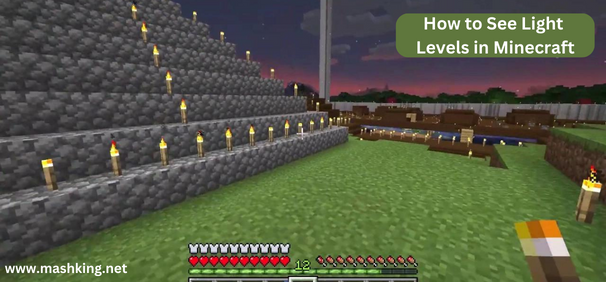
How to See Light Levels in Minecraft Is a basic Question that arises while playing Minecraft. In the vast and blocky world of Minecraft, light plays a crucial role in shaping the gameplay experience. Understanding light levels and their impact can make a significant difference in survival, exploration, and building projects. In this article, we will explore the mechanics behind light levels, how they affect gameplay, and provide practical tips on seeing light levels in Minecraft.
Mechanics
Light Sources in Minecraft
In Minecraft, there are various light sources that emit light and affect the surrounding blocks’ brightness. The most common light sources include torches, glowstone, lanterns, and Redstone lamps. By strategically placing these light sources, you can illuminate your surroundings and create safe zones.
How Light Propagates in the Game World
Light in Minecraft behaves differently than in the real world. It spreads from its source in a spherical manner, gradually decreasing in intensity as it travels. It can pass through transparent blocks like glass and water, but opaque blocks obstruct its path, resulting in shadowed areas.
Understanding Light Level Measurements
Light levels in Minecraft are measured on a scale of 0 to 15. A light level of 0 indicates complete darkness, while 15 represents the maximum brightness. Different blocks and entities have specific light-level requirements for certain activities, such as crop growth and mob spawning.
Factors That Affect Light Levels
Several factors can influence light levels in Minecraft. The time of day affects natural light levels, with brighter levels during the day and darker levels at night. Block obstructions, such as trees or buildings, can cast shadows and reduce light. Additionally, light can travel through transparent blocks, so utilizing materials like glass can maintain higher light levels while still providing protection.
Different Light Levels and Their Meanings
Understanding the significance of different light levels is essential for effective gameplay. Light levels below 7 allow hostile mobs to spawn, endangering players. A light level of 8 or higher prevents mob spawning, ensuring a safer environment. Different activities in Minecraft, such as farming, mining, or constructing redstone contraptions, may require specific light levels for optimal efficiency.
Tips for Optimizing Light Levels in Your Builds
- Place light sources strategically throughout your base and surrounding areas to maintain a safe environment.
- Use torches, lanterns, or other light-emitting blocks to brighten dark corners and pathways.
- Employ different light sources creatively to add ambiance and aesthetic appeal to your builds.
- Experiment with light level combinations to achieve desired effects in different areas, such as soft lighting for relaxation areas or bright lighting for workspaces.
Tools For How to See Light Levels in Minecraft
Using the Debug Screen
Minecraft provides a useful debug screen that can display various game information, including light levels. To access the debug screen, press the F3 key (or Fn + F3 on some laptops). The debug screen shows detailed information about the game world, including the current light level at the player’s position.
Installing Resource Packs for Light Level Visualization
Resource packs, also known as texture packs, can modify the appearance of Minecraft’s visuals. Some resource packs include features that enhance light-level visibility. You can find and install resource packs that provide clearer indications of light levels, making it easier to identify well-lit and dark areas.
Mods and Plugins for Enhanced Light Level Visibility
If you’re playing Minecraft on the Java Edition, you can take advantage of mods and plugins to improve light-level visualization. Mods like “Light Level Overlay Reloaded” display the light level of every block in the game, allowing you to identify areas that may require additional lighting.
Practical Tips for How to See Light Levels in Minecraft
Lighting Up Your Base and Preventing Mob Spawns
When building your base, ensuring proper lighting is crucial to prevent hostile mob spawns. Place torches or other light sources around your base, paying attention to potential dark spots like corners and entrances. Illuminating your base not only enhances safety but also makes it more visually appealing.
Efficient Torch Placement Strategies
Placing torches in a well-thought-out manner can significantly impact light levels and mob spawning. Consider placing torches approximately seven blocks apart to achieve an optimal light level of 8 or higher in all directions. Utilize wall-mounted torches, ceiling lights, or chandeliers to cover larger areas effectively.
Identifying Dark Areas and Potential Mob Spawning Spots
Regularly inspect your base and surrounding areas for dark spots where mobs could potentially spawn. These areas are often found in caves, dense forests, or underground passages. By identifying and illuminating these dark areas, you can minimize the risk of unexpected mob encounters.
Light Level Requirements for Specific Activities
Different activities in Minecraft have specific light-level requirements for optimal results. For example, if you’re farming crops, ensure the light level is at least 8 to maximize growth rates. Similarly, when constructing redstone contraptions, certain components may require specific light levels for proper functionality. Understanding these requirements enhances efficiency and prevents issues.
Conclusion
Mastering light levels in Minecraft is essential for an enjoyable and successful gameplay experience. By understanding the mechanics of light, utilizing tools like the debug screen, and implementing practical tips for lighting up your base, you can create a safer and more vibrant world. Paying attention to light levels ensures optimal conditions for various activities and enhances your overall immersion in the game.
Frequently Asked Questions (FAQs) for How to See Light Levels in Minecraft
Q 1: How do I toggle the debug screen in Minecraft?
Answer- To toggle the debug screen in Minecraft, press the F3 key (or Fn + F3 on some laptops). The debug screen provides valuable information about the game world, including light levels.
Q 2: Can I change the brightness of light sources?
Answer- No, the brightness of light sources in Minecraft is fixed. However, you can increase the overall brightness of your game by adjusting the brightness settings in the video options menu.
Q 3: How can I prevent mob spawns in my base?
Answer- To prevent mob spawns in your base, ensure that the light level is 8 or higher in all areas. Place torches or other light sources strategically to eliminate dark spots.
Q 4: What is the maximum light level in Minecraft?
Answer- The maximum light level in Minecraft is 15. This represents the brightest level of illumination.
Q 5: Do light levels affect crop growth?
Answer- Yes, light levels affect crop growth in Minecraft. For optimal growth rates, ensure the light level is at least 8 around your crops.
Q 6: Can I use light-level mechanics for Redstone?
Answer- Yes, certain redstone components in Minecraft, such as daylight sensors, are influenced by light levels. Understanding light-level mechanics can help you create more advanced redstone contraptions.
Q 7: Are there any mods that improve light visibility?
Answer- Yes, there are mods available for the Java Edition of Minecraft that enhance light-level visibility. One popular mod is “Light Level Overlay Reloaded,” which displays the light level of each block.
Q 8: How do light levels impact mob spawning rates?
Answer- Light levels significantly impact mob spawning rates in Minecraft. Hostile mobs require light levels of 7 or lower to spawn, while a light level of 8 or higher prevents mob spawns. By maintaining sufficient lighting, you can reduce the risk of mob encounters in your surroundings.