Table of Contents
How to Fix “Failed to load steamui.dll” Steam Error
The Steam game market has become an integral part of almost every hardcore gamer. Gamers like me are using the vast marketplace of Steam to purchase the games and play them with our virtual friends. The steam is now the most popular online game market with millions of free and paid games. But, the standalone desktop software is not perfect at all. Gamers will face a lot of issues anytime while trying to open the Steam and also while playing the games. The Failed to Load SteamUi.DLL error is one such annoying issue faced by users.
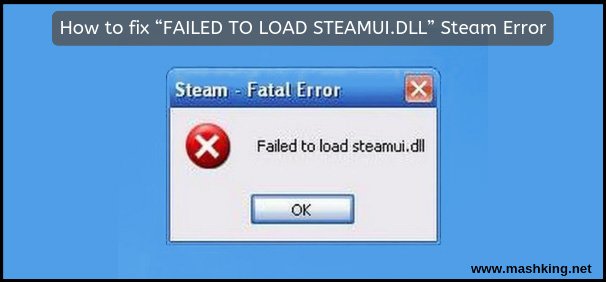
While opening the Steam desktop client for purchasing or playing the games, users see this error message of “Failed to Load SteamUi.DLL.” The message says that the client was unable to open the SteamUi.DLL file, which is the Dynamically Linked Library of the Steam User Interface. Without this file, the Steam client cannot load on your computer. If you are facing this issue, then you should act immediately and fix this problem. In this post, you’ll find multiple solutions to get rid of the Failed to Load SteamUi.DLL error on your computer while loading the Steam Desktop Client.
What is SteamUI.DLL Error Message in Windows?
The SteamUi.DLL is a dynamically linked library file for the Steam, desktop client. The Windows OS supports the DLL files, which is the file format for storing the large components in a library format. When the software needs a certain element from the library, it loads the DLL file assigned to it. The Steam Client loads the SteamUI.DLL file to render the User Interface components. But, when the file is corrupted or not found on the storage, then you see the SteamUI.DLL missing error in Windows.
How to Fix “Failed to load steamui.dll” Steam Error
If you are willing to fix this problem immediately, then there are multiple methods to fix the issue. Below, you’ll find some working solutions that you have to follow and get rid of the problem within a few minutes.
Method #1 – Register SteamUI.DLL file
No application can utilize the DLL file without registering it with the Windows OS. If by any chance the Steam client failed to register the file, users will face this problem. In such case, you have to manually register the DLL file on behalf of the Steam client and fix the issue.
- First of all, press “Windows + X” key combination on the keyboard and click on “ Command Prompt ( Run As Administrator )”.
- Accept the UAC confirmation to grant the Administrative access.
- In the Command Prompt, we have to change the Directory to the Steam installation. You have to copy and paste this command to change the directory. Make sure you enter the destination where you’ve installed the steam.cd C:\Program Files (x86)\Steam
- This is the default installation directory for Steam. Once you change the destination directory in Command Prompt, it’s time to register the DLL file. Copy and paste this command and press ENTER to register the file.regsvr32 steamui.dll
- The process will complete within a few seconds. After that, restart your computer and then see if the steam client starts without error or not.
Method #2 – Flush Steam Config
The Steam configuration files store the data of your configuration. If you’ve messed with the customization settings, then flushing or removing the Config files is the best option to fix this issue. If the above method is not working for you, then you should try flushing the configuration files.
- First of all, open the RUN window by pressing “Windows key + R” key combination on the keyboard.
- In the RUN window, type or copy and paste the following command and Press ENTER.steam://flushconfig
- After flushing the files, restart your computer and then try to open the Steam Desktop client and observe if you are still facing the issue or not.
Method #3 – Delete BIN and Package Folders
The Installation directory of Steam contains the BIN and Package folders. These folders have configuration and temporary files. According to many users, deleting these folders have fixed the issue immediately. Here are the exact steps to remove these folders and get rid of the problem.
- First of all, right-click on the “Steam” icon on your desktop and select the “Open File Location” to open the installation directory.
- In the Installation Directory, find and delete the folder named “Bin” and “Package”.
- After deleting these folders, restart the Steam client and see if the issue is fixed or not. Many people have reported this method is working for them.
Method #4 – Delete Beta Version Registry Entries
If you are using the Beta version of the Steam client for testing, then you may face such issues anytime. The Beta releases of any application are full of bugs, which may cause such problems. But, if you delete the Registry Entries of the Beta version, then you’ll be switched to the regular release of the Steam client. Here are the steps to remove registry entries within a few seconds.
- First of all, open the Registry editor by pressing “Windows key + R” key combination, type “regedit” and press ENTER.
- In the Registry Editor, you’ll find tons of registry entries. On the left side, you’ll find the folder directories and on the right side, you’ll find the entries in each folder.
- Navigate to the following directory path and delete all of the entries by selecting them and pressing “DEL” button on your keyboard.HKEY_CURRENT_USER\Software\Valve\Steam\Beta
- After deleting the entries, close the Registry editor and restart your computer. Once restarted, launch the steam client and most certainly, you won’t face this issue at all.
Method #5 – Reinstall the Steam Client
If any of the methods mentioned above are not working for you, then you should opt for this method. You should reinstall the Steam client on your computer. First, uninstall it completely from the Control Panel and then download the latest version from the official site and install it. If the issue is in the installation as all of the files are corrupted, then installing the official release from the website will help you a lot.
This is the last resort for you if any of the mentioned methods are not working for you. Make sure to take a backup of the game files as uninstalling the Steam client will delete all installed games.
Final Words
So, this is all we have about how to fix Failed to load steamui.dll error. The problem is straightforward to resolve if you take immediate steps. I hope you liked the collection of solutions that will help you to get rid of failed to load SteamUI.DLL error message on Windows.


